The following steps indicate an approach to building a human head.
Successful results depend on having good reference!
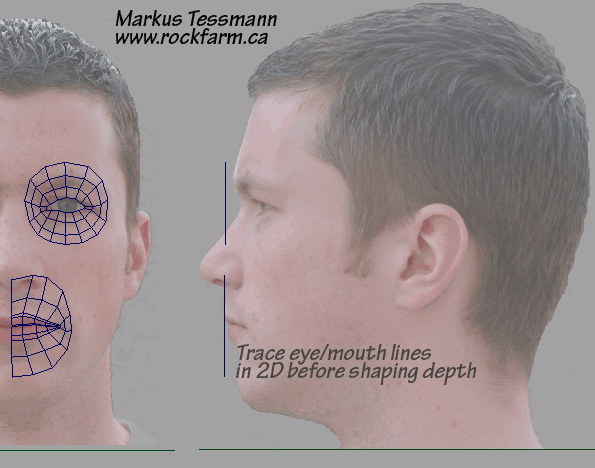
Begin by tracing the area where the eyeball is visible as a 2D polygon and extrude outwards as shown. Do the same for the mouth, tracing the thin line where the lips meet to create a long thin polygon. This stage is essential for capturing the shape and position of the eyes and mouth, which are key indicators for people to recognize a face.
For now, focus on the exterior of the face, but later those original shapes can be extruded inward to create the interior of the eyelids and lips
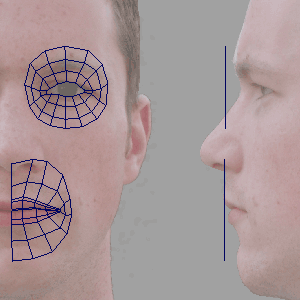
Working only on from the side view of the head, drag the vertices closer to the face, lining them up with your reference. Do not move the vertices up or down in the side view - just horizontally, closer to the face.
It is very important that your reference images are properly aligned in your 3D workspace to get accurate results.
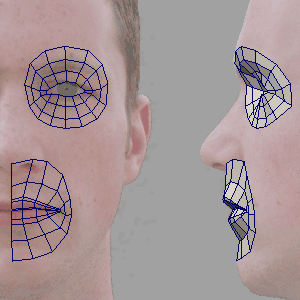
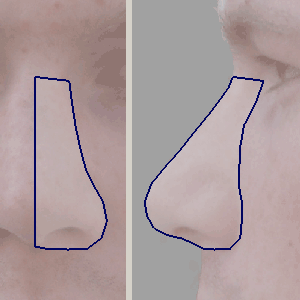
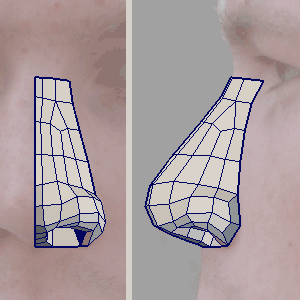
The nose is a very complex shape and requires special attention
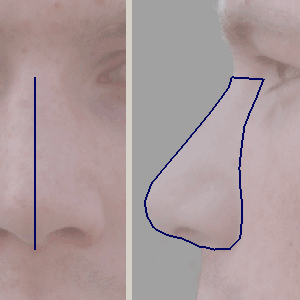
Start by creating a polygon outline of the nose from the side view of the face
Working from a front view, pull the vertices of the nose profile across the face until the edge of the profile at the base of the nose lines up with where it lands on the face.
Note that this will result in a very non-planar polygon outlining the nose in 3D!
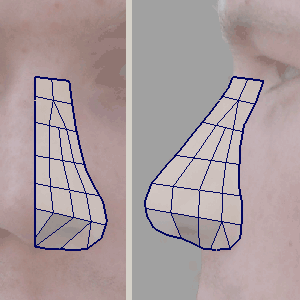
Subdivide that non-planar polygon with a series of edges, roughly as shown here, to create quads across the surface. You can easily add or remove edges later as needed so don't be too particular at this stage.
Note that your border edge will likely have extra vertices. You should delete those now so that all your border polygons are quads.
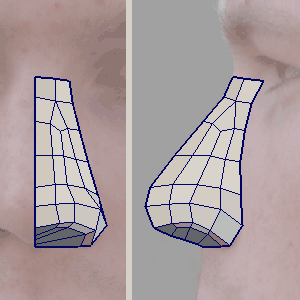
Now you can begin to sculpt the vertices to form the shape of the nose. You may need to add edge loops at this stage (as seen where the nostril will be in this image).
It is important to realize that with a different looking nose, the edges needed will be different so consider your reference when implementing this modelling approach and make choices suitable to your model.
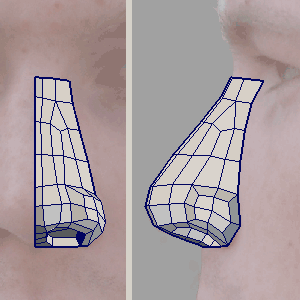
Add an edge loop along the front of the nose so that it is slightly broader and doesn't come to a point.
Extrude the 4 faces at the side of the nostril to add detail in that region, including the crease where the nose meets the face.
Extrude the nostril up into the face, making sure to leave a line of polygons between the edge of the nostril and the center of the nose.
Change the edge flow at the front of the extruded nostril section to better integrate it into the tip of the nose.
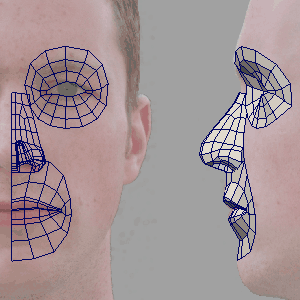
Modelled in place, the nose should line up with the other features of the face.

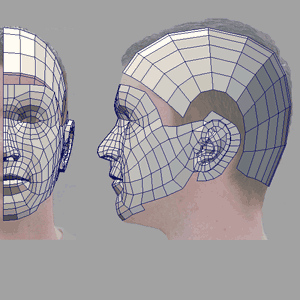
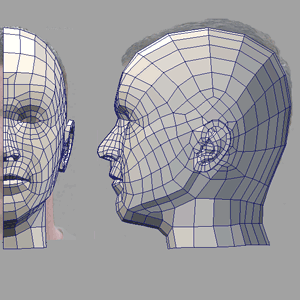
Stitch the eyes, nose and mouth together. Add detail as necessary, as around the mouth in this example.
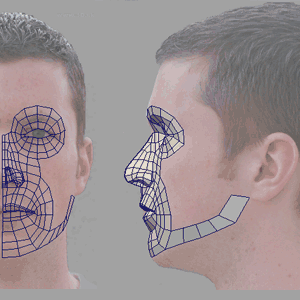
Create a strip of quads to follow the line of the jaw.
Take care to get this as close to your reference as possible as this is another defining characteristic of the head.

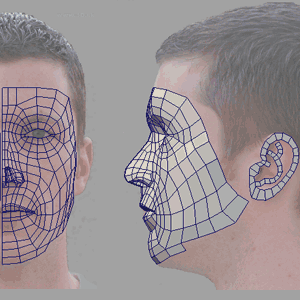
Create poly strips following the ridges of the ear.
Using the jaw as your guide, fill in the rest of the face.
This may look easy but involves careful consideration for the placement of each polygon, not only to capture the shape of the cheek, but also to maintain edge flow.

Continue to add quads as necessary to meet the ear.
Fill in the gaps of the ear and sculpt the vertices to form the shape.
The structure of the top and back of the skull can be sculpted from a sphere.
Create a sphere with about 18 divisions in both height and circumference. Align the sphere with the head reference, with the poles of the sphere where the ears would be. Delete all but the faces shown
Skulls are not spherical in shape! Using a sphere only gives you a good quad/edge flow layout. The sphere must be sculpted into a skull shape before connecting it to the front of the face. Use a lattice deformation tool or some other broad influence to shape the skull.
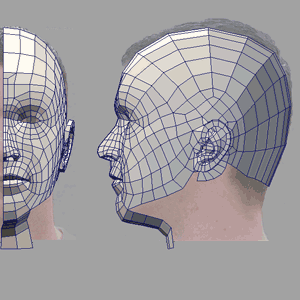
Connect the skull to the face, maintaining quads and edge loop structure.
The chin can be meshed in, down to the neck at any time.
Close the chin, extrude the neck down and the head is mostly done.
The finishing steps (not shown here) would include: